Digital Signature Agreements
With Destiny Resource Manager's Digital Signature Agreements, districts and schools can let parents, teachers, and students digitally sign acceptable use policies and other agreements required for 1:1 devices and other resources.
After an administrator or user with the Manage resource templates or Manage Digital Signature Agreements (Resource Manager) permission creates an agreement, it can be signed during checkout or by accessing the signature form from a URL. Access reports that show items checked out without a signature and signed agreements.
|
Important:
|
To create an agreement:
- Select either Catalog or Admin > Digital Signature Agreements.
Notes:
Users with the Manage resource templates permission can select Catalog > Add Resource > Edit Templates tab, scroll to the bottom of the page, and click Setup Agreements.
If the Digital Signature Agreements app does not launch right away, click the link to access it.

- Click Create Agreement. The Agreement Template appears.
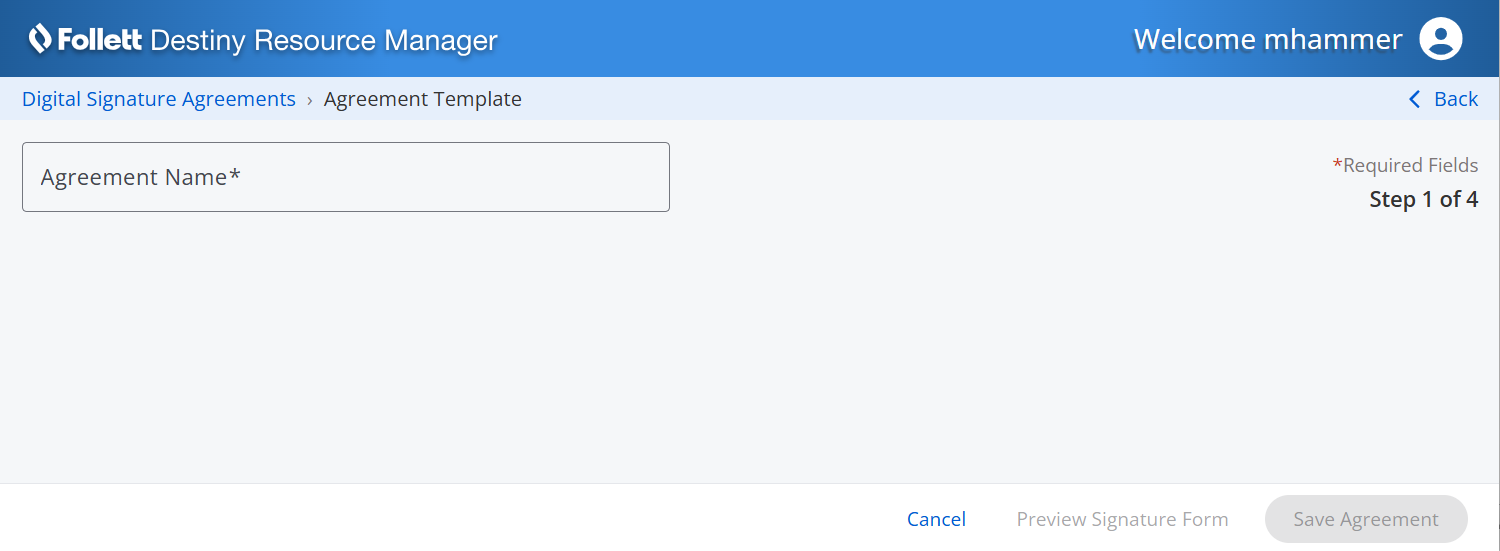
- In the Agreement Name field, enter a unique name. Step 2 of 4: Mapping appears.
- In Step 2 of 4: Mapping, do the following:
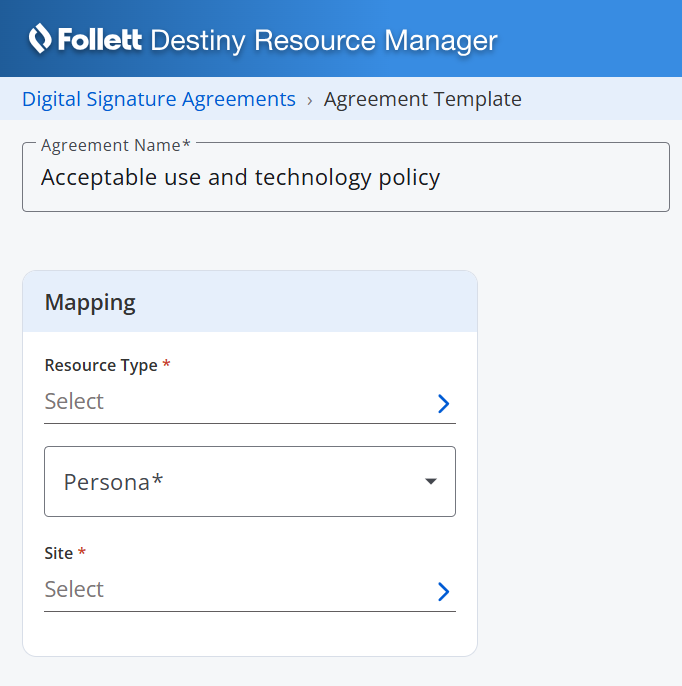
- Click in the Resource Type field to select the specific resource types the agreement is for. The 'Select resource types to include' pop-up appears.
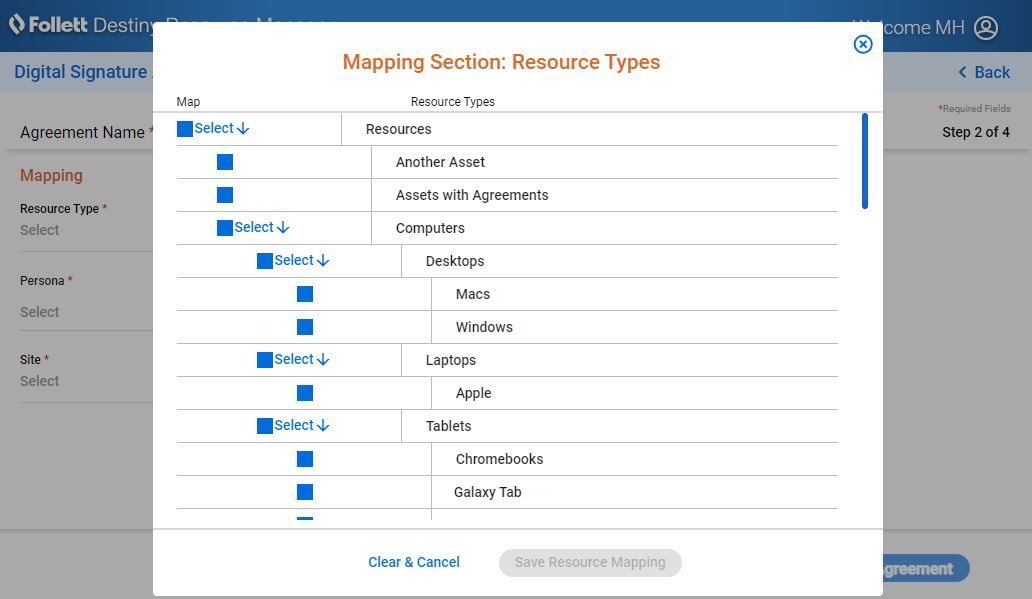
- Select a checkbox next to a resource, or click
 to include all resources nested below it.
 - Click Save.
- From the Persona drop-down, select the group of patrons the agreement is for.
Important: The Persona field must be configured on the Admin > Resource Policies > Patron Types tab for Digital Signature Agreements to work during checkout and to run the Digital Signature reports. For example, if the persona is set to something other than Student for a student patron type, but the agreement is created for the Student persona, no block message appears and the item is checked out without a signed agreement. - To select the site or site types the agreement is for, click anywhere in the Site field. The 'Select sites to include' pop-up appears.
- Select the checkbox next to the sites, or click to include all sites nested below.
- Click Save. Step 3 of 4: Agreement Details appears.
- Click in the Resource Type field to select the specific resource types the agreement is for. The 'Select resource types to include' pop-up appears.
- In Step 3 of 4: Agreement Details, do the following:
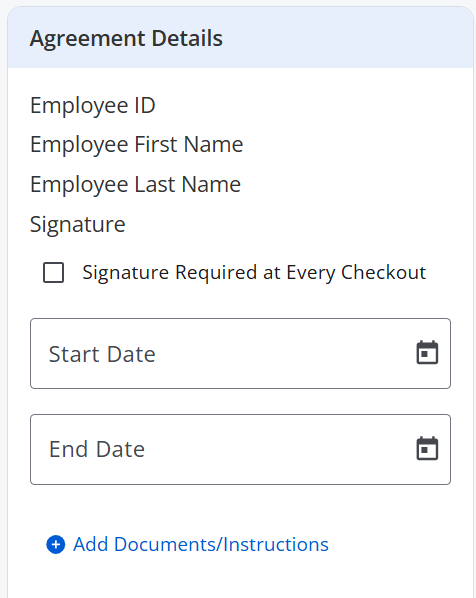
- To require users to sign an agreement every time they check out a mapped resource type, regardless of how many times they check out a resource of that type, select the Signature Required at Every Checkout checkbox.
Note: If you select this checkbox, the link to share the agreement is disabled, because the agreement must be signed during checkout. Agreements used at checkout are not shared ahead of time.

- To limit when signatures are obtained, enter a date range in the Start Date and End Date fields.
Note: You can limit to one date or a range.
- All dates: Leave both fields blank.
- One date: Enter the same date in both fields.
- Up to and including a specific date: Leave the Start Date field blank, and enter a date in End Date.
- A specific date and all those after it: Enter a date in Start Date , and leave End Date blank.
- Click Add Documents/Instructions.
- To require users to sign an agreement every time they check out a mapped resource type, regardless of how many times they check out a resource of that type, select the Signature Required at Every Checkout checkbox.
- In Step 4 of 4: Agreement Documents, do the following:
- In the Upload Agreement Document(s) field, drag and drop a file, or search for a file on your computer or network.
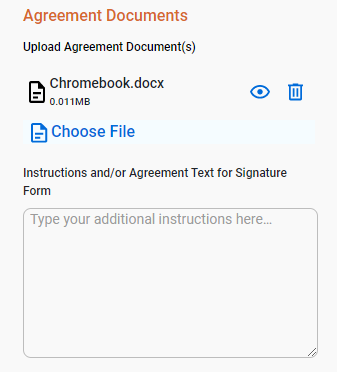
Note: Supported file types are PDF, DOCX, XLSX, PNG, JPG, JPEG, GIF, TIF, TIFF, SVG, TXT, RTF, XML, JSON, and HTML. The maximum file size is 25 MB per file.
- To include instructions or a note, type in the text field.
- In the Upload Agreement Document(s) field, drag and drop a file, or search for a file on your computer or network.
- To view the signature form before saving, click Preview Signature Form.
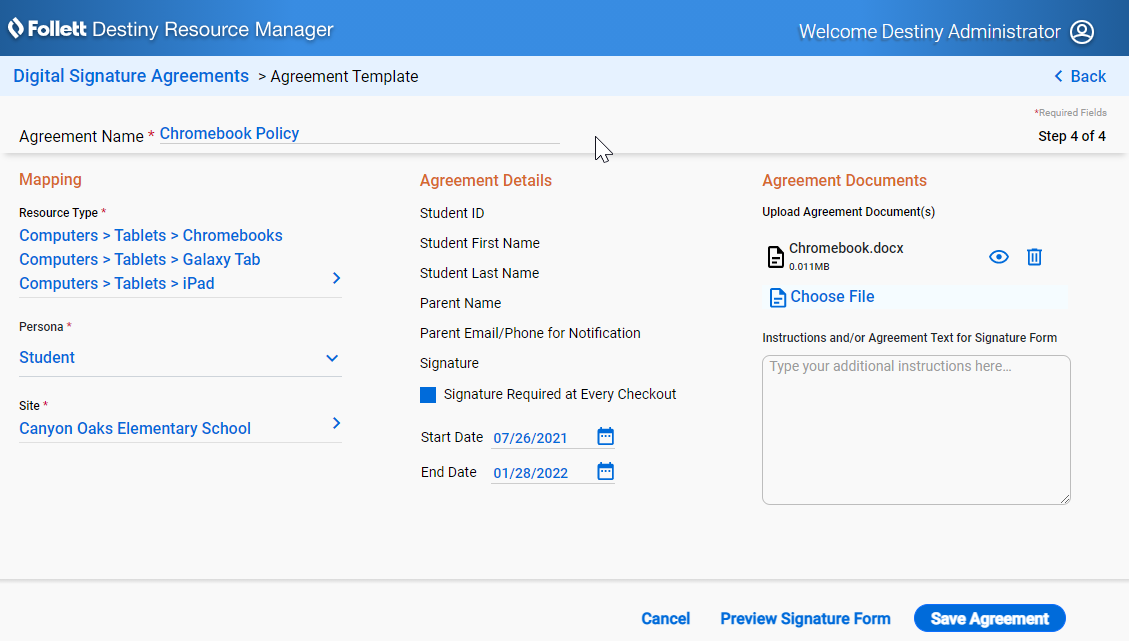
- If you opened a preview, click Close.
- Click Save Agreement.
- When the success pop-up appears, click Continue to Signature Agreements.
After the agreement is created, you can do the following:
Edit an agreement
- Click
 .
. - Make your changes.
- Click Save Agreement.
|
Note: Once an agreement has been signed, you can no longer edit the agreement. |
View an agreement
- Click
 .
. - To preview the form, click Preview Signature Form.
- To return to the main page, click Digital Signature Agreements or Back.
Copy the signature form URL to the clipboard
Click  .
.
The link is copied. You can paste it into an email or elsewhere to share with faculty or students.
Duplicate an agreement
- Click
 .
. - Make your changes.
- Click Save Agreement.
Delete an agreement
- Click
 .
. - On the pop-up message, click Yes, Delete this Agreement.
Signature Form
Resource Manager automatically looks for signed agreements during checkout, and provides an on-screen notification when a signature is needed. You can get signatures before checkout by providing parents and teachers with a URL, or at the time of checkout.
Sign agreements with a URL link
Every time an agreement is saved, it is assigned a unique URL. You can copy the URL from the main Digital Signature Agreements page, or when you save a newly created or edited agreement. Share the URL with parents or staff to sign the agreement before resource distribution. All fields must be completed on the Signature Form page.
| Note: The patron's District ID is used in the ID field to verify identity. |
Sign agreements at checkout
If an agreement is not signed ahead of time, it can be signed at the time of checkout. When the resource is checked out, a blocked-transaction message appears with a link to the agreement's signature form.
- To have the patron or their guardian sign the agreement, click the link under This item requires a signed agreement be on file at the time of check out.
- If there are multiple agreements to sign before the item can be checked out, click each link on the Check Out Item page.
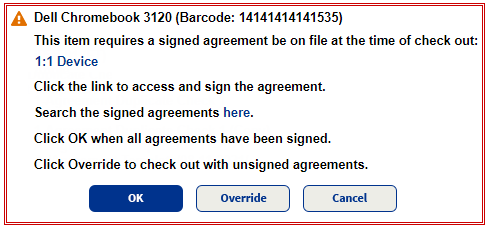
- After all fields on the signature form are completed and the form is signed, you can check out the item.
| Note: Although users with the appropriate permission can override a block message for missing signatures during checkout, districts or schools may want a policy in place for when blocked transactions for unsigned agreements can be overridden. |
Digital Signature Reports
The following reports are available:
- The Block Overrides report shows items that were checked out without signatures on the associated agreements (the block message was overridden).
- The Needs Signature report lets you see patron checkouts that are missing digital signatures.
- The Signed Agreements report shows all agreements that have been signed.
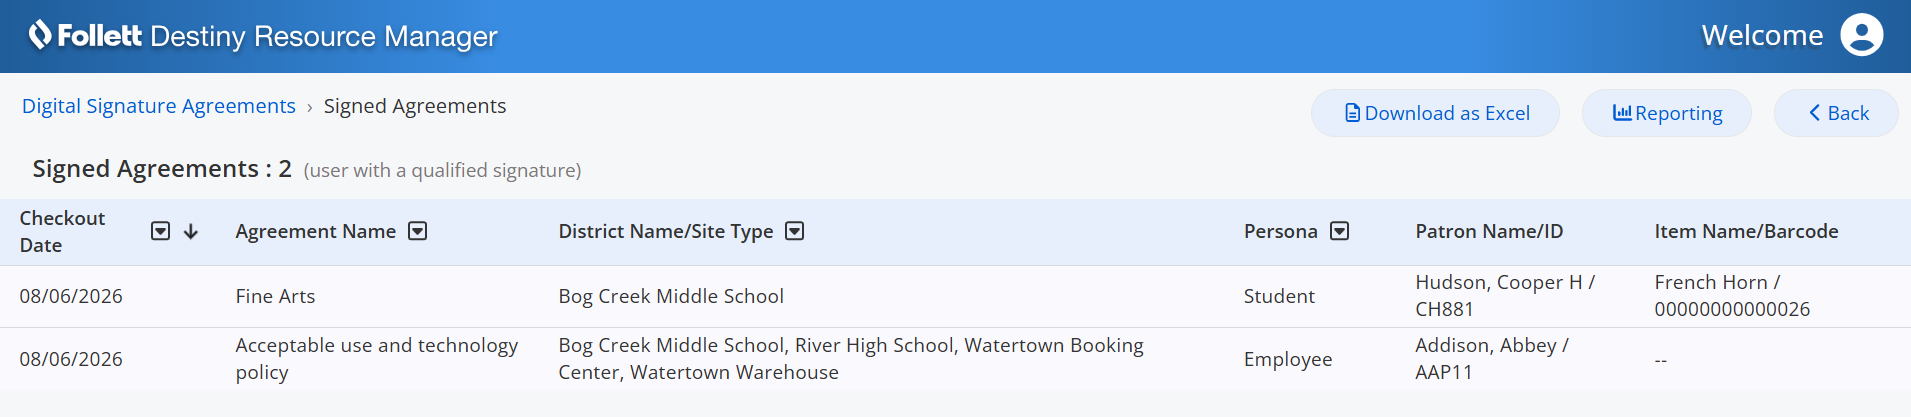
To access the reports:
- Select Catalog or Admin > Digital Signature Agreements.
- In the top-right corner, click Reporting, and then choose the report you want.
- Do any or all of the following:
- To filter the report, click
 in a header name, and then make your selection from the drop-down.
 - To sort the report, click
 in a header row.
 - To download the report as an XLS spreadsheet, click Download as Excel.
- To filter the report, click