Edit or delete a patron
Each Destiny user is considered a patron and must have a patron record that associates them with the materials they check out, fines they incur, and any patron transactions. Typically, you edit a patron when they:
- Transfer to or from another location (school or public library)
- Alert you to incorrect information in their records
|
Important: If you have an automated patron update process in place, any manual edits to a patron record are overwritten the next time the automated update runs. |
|
Notes:
|
To search for and edit a patron:
- You can search for a patron in two ways:
- Select Patrons > Search.
- Select Admin > Manage Patrons.
- Conduct a search, and then do one of the following:
- If you searched from Patrons > Search and there was only one match, the patron's details page opens, and you can proceed to the next step.
- If your search had multiple matches, next to the record you want to edit, click
 or Edit (depending on the page you are on).
- Make changes to the patron information as needed.
In the User Name field, use special characters (such as periods, dashes, underscores and apostrophes) to minimize the risk of patrons being considered duplicates or skipped during a patron import.
Example: jsmith, j.smith, j-smith, j_smith, j'smith are each considered different patrons.
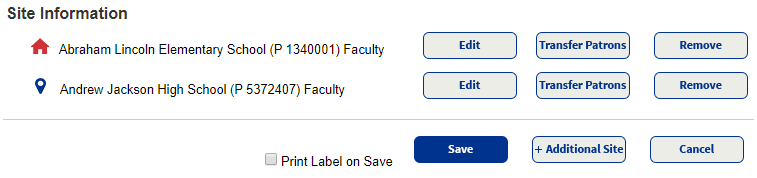
- To print a label when you save, select the Print Label on Save checkbox.
Note: For more information, see Print patron barcode labels. - (Optional) Edit address information, or add a picture:
If you want to ... Then ... Update address information - Click the Address tab.
- Update address information, including:
- Primary or secondary address
- Primary or secondary phone numbers
Add a picture - Click the Picture tab.
- Add a patron picture.
- When you are done, click Save.
Delete a patron
- You can search for a patron in two ways:
- Select Patrons > Search.
- Select Admin > Manage Patrons.
- Use the following table to delete a patron, based on your search results:
If you searched from... Then...
Patrons > Search, and there was an exact match
The patron's record opens automatically. From the Actions menu on the right, click Delete.
Note: To access the Actions menu, you need to enable the new Patron Details look (if you haven't already).
Patrons > Search, and there were multiple search results
- Next to the patron you want to edit, click .
- From the Actions menu on the right, click Delete.
Note: To access the Actions menu, you need to enable the new Patron Details look (if you haven't already).
Admin > Manage Patrons
- Next to the patron you want to edit, click Edit.
- From the Actions menu on the right, click Delete.
Note: To access the Actions menu, you need to enable the new Patron Details look (if you haven't already).
- Next to the patron you want to edit, click
- Review the confirmation message, and click Yes to proceed.